Introduction
When a car starts misfiring, idling roughly, or suddenly losing power, many drivers assume there’s a problem with the ignition coils, sensors, or fuel injectors. But in reality, one of the most common and overlooked causes is an incorrect spark plug gap—and learning how to gap spark plugs with feeler gauge can solve the issue instantly.
The small distance between the center electrode and the ground strap plays a major role in creating a strong, clean spark. If this gap is even slightly too wide or too tight, the spark weakens, combustion becomes inefficient, and the engine begins to behave poorly.
The good news? Setting the correct spark plug gap with a feeler gauge is a simple and beginner-friendly DIY job. Even if you’ve never done it before, you can adjust the gap properly at home in just a few minutes.
In this guide, you’ll learn:
✅ What spark plug gapping actually means
✅ Why does the gap become incorrect over time?
✅ Common symptoms of a wrong spark plug gap
✅ Tools required for accurate gapping
✅ Step-by-step instructions on how to gap spark plugs with feeler gauge
✅ Mistakes you should avoid
✅ When to check or replace spark plugs
✅ A helpful comparison table for quick reference
By the end of this guide, you’ll know exactly how to gap spark plugs with a feeler gauge safely and confidently—and your engine will run smoother, stronger, and far more efficiently.
Table of Contents
What Is Spark Plug Gap?
Spark plug gap can become incorrect due to:
- Pre-gapped plugs not matching your engine spec
- The plug was accidentally bent while handling.
- Carbon buildup is increasing the gap.
- Using the wrong spark plug type
- Electrode wear over high mileage
- Over-tightening the plug and bending the ground strap

Why Spark Plug Gap Goes Wrong
Spark plug gap can become incorrect due to:
- Pre-gapped plugs not matching your engine spec
- The plug was accidentally bent while handling.
- Carbon buildup is increasing the gap.
- Using the wrong spark plug type
- Electrode wear over high mileage
- Over-tightening the plug and bending the ground strap
Symptoms of Incorrect Spark Plug Gap
A wrong spark plug gap can cause:
- Rough or shaking idle
- Slow or delayed acceleration
- Hard starting
- Poor fuel economy
- Engine misfires
- Check Engine Light
- Exhaust popping sounds
- Loss of power
Tools You Need
- Feeler gauge (blade or wire type)
- Spark plug gap tool
- Spark plug socket + ratchet
- Torque wrench (recommended)
- Clean cloth or rubbing alcohol
How to Gap Spark Plugs with a Feeler Gauge (Step-by-Step)
Step 1: Check the Factory Specification
Find the correct gap for your engine in:
✔ The owner’s manual
✔ The sticker under your hood
✔ The manufacturer’s website
Example: 0.028–0.032 inches
Step 2: Clean the Spark Plug
Wipe the plug gently with a clean cloth.
Do NOT sand iridium or platinum spark plugs.
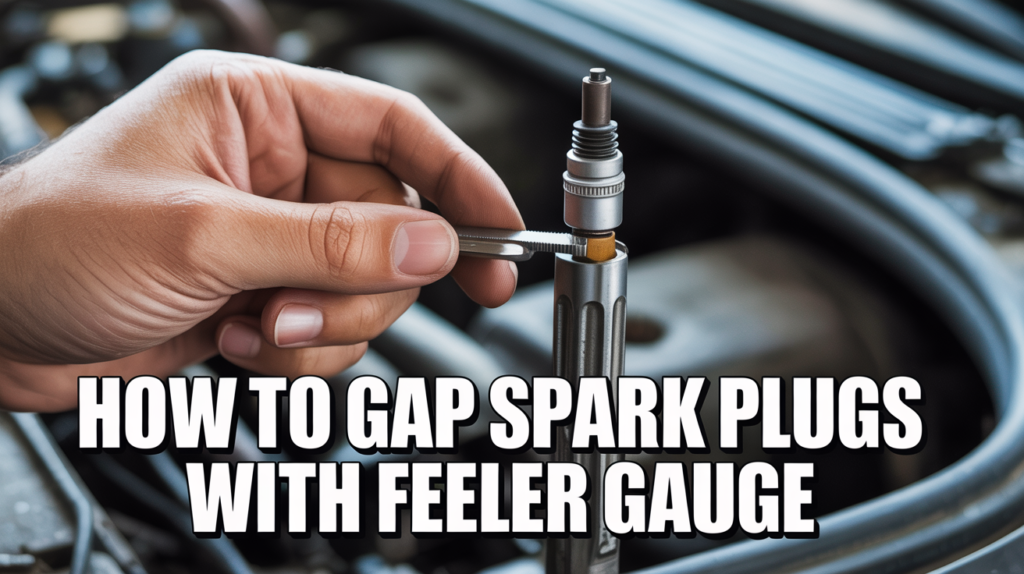
Step 3: Insert the Feeler Gauge
Slide the correct gauge blade between the two electrodes:
- Light drag → Gap is correct
- Slides too easily → Gap is too wide
- Doesn’t fit → Gap is too tight
Step 4: Adjust the Gap
If the gap is too wide:
Gently press the ground strap downward using a flat surface.
Never touch or press the center electrode.
If the gap is too tight:
Use a spark plug gap tool to slightly pull the ground strap outward.
Step 5: Recheck the Gap
Reinsert the feeler gauge until you feel a perfect light resistance.
Step 6: Reinstall the Spark Plug
- Hand-tighten first
- Then use a torque wrench to tighten to 18–25 ft-lbs (varies by engine)
Comparison Table: Spark Plug Gap Issues & Effects
| Gap Issue | Symptoms | Engine Effect | Best Fix |
|---|---|---|---|
| Gap Too Wide | Misfires, weak acceleration | Weak spark | Reduce the gap |
| Gap Too Tight | Hard starting, rough idle | Restricted spark | Increase the gap |
| Uneven Gaps | Random misfires | Poor balance | Equalize all gaps |
| Carbon Build-Up | Hesitation, power loss | Disrupted spark | Clean or replace plug |
| Worn Electrodes | High mileage misfires | Weak spark | Replace spark plugs |
Common Mistakes to Avoid
❌ Bending the center electrode
❌ Using pliers or a hammer to adjust
❌ Not checking pre-gapped plugs
❌ Over-tightening the spark plug
❌ Setting different gaps in different cylinders
When to Check or Replace Spark Plugs
| Plug Type | Replacement Interval |
|---|---|
| Copper | 20,000–30,000 miles |
| Platinum | 50,000–60,000 miles |
| Iridium | 80,000–100,000 miles |
Check the spark plug gap if you notice:
✔ Misfires
✔ Rough idle
✔ Decreased fuel mileage
✔ High mileage service interval
Conclusion: How to gap spark plugs with feeler gauge
A properly set spark plug gap is critical for clean combustion, smooth idling, strong acceleration, and overall engine health. While it may look like a tiny detail, it has a big impact on performance.
Using a feeler gauge and adjusting the gap carefully is a simple DIY task that anyone can do at home. With the right steps and a little patience, you can easily prevent misfires, improve fuel efficiency, and make your engine run noticeably smoother.
Regular gap checks and proper installation can significantly boost your car’s performance, reliability, and lifespan.
FAQs
1. Do all spark plugs need gapping?
Not always—but you should still check every new plug before installation.
2. Can I gap iridium spark plugs?
Yes, but very gently. Only adjust the ground strap.
3. What happens if the gap is too big?
You’ll get a weak spark, misfires, hesitation, and poor fuel economy.
4. What if the gap is too tight?
The spark becomes restricted, leading to rough idle and hard starting.
5. Which tool is best for measuring spark plug gap?
A feeler gauge—it’s the most accurate.
6. Can the wrong gap damage ignition coils?
Yes. A large gap forces the coil to work harder, causing overheating and failure.
7. How often should I check the gap?
Check new plugs before installing and every 20,000–30,000 miles afterward.